
On this page
1.1 Download the HashNut MPC Client1.2 Initialise the wallet1.3 Filling in the one-key setup parameters1.4 Save the account info1. One-Key Setup
1.1 Download the HashNut MPC Client
Download the latest HashNut MPC Client for your OS and CPU architecture from the address below, then unpack it.
https://github.com/nuttybounty/hashnut-mpc-client/releasesNOTE
There is no windows-arm64 build yet, but the windows-amd64 build has been tested and runs fine on windows-arm64 machines.
NOTE
On macOS you also need to run the following to get past Gatekeeper.
xattr -cr ./hashnut-mpc-mainnet-darwin-arm64If you downloaded the amd64 build, run:
xattr -cr ./hashnut-mpc-mainnet-darwin-amd64NOTE
HashNut never stores your private key or your password — keep them safe, they cannot be recovered. Importing a private key creates keys.db; keep that safe too, or you will not be able to add receipt addresses later. Always keep keys.db in the same folder as the client.
1.2 Initialise the wallet
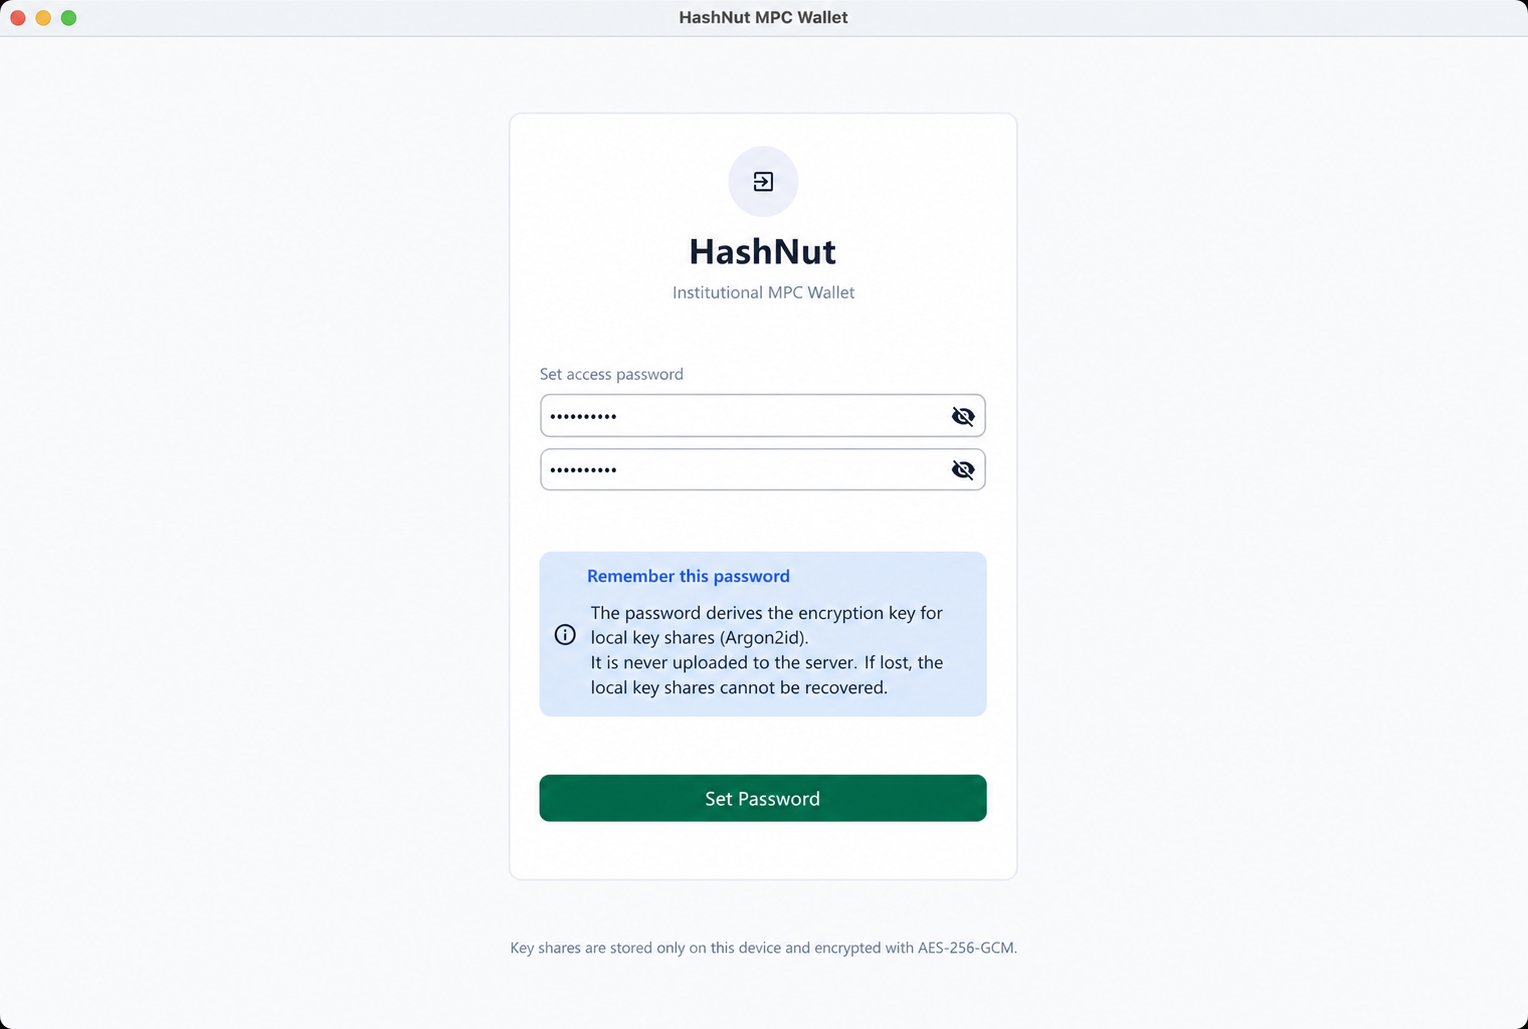
Set a password
Import your wallet's private key
Import the private key into the wallet. The default chain type is
evm; choosetronif it is a Tron wallet.Click "Import Wallet"
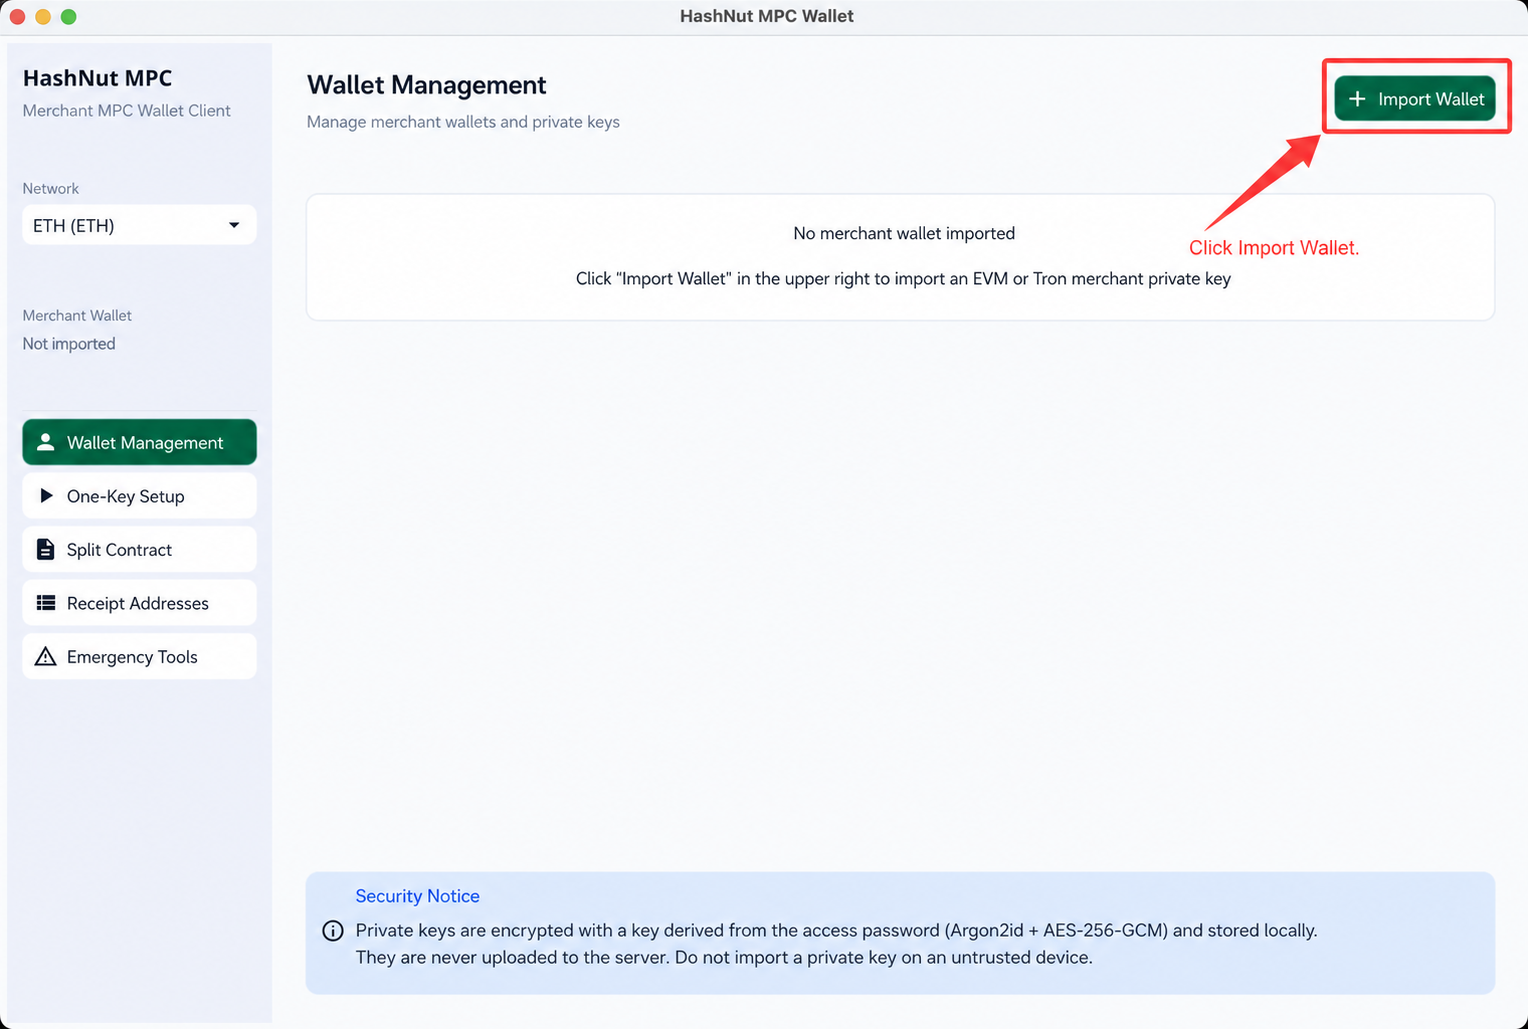
Choose the wallet type
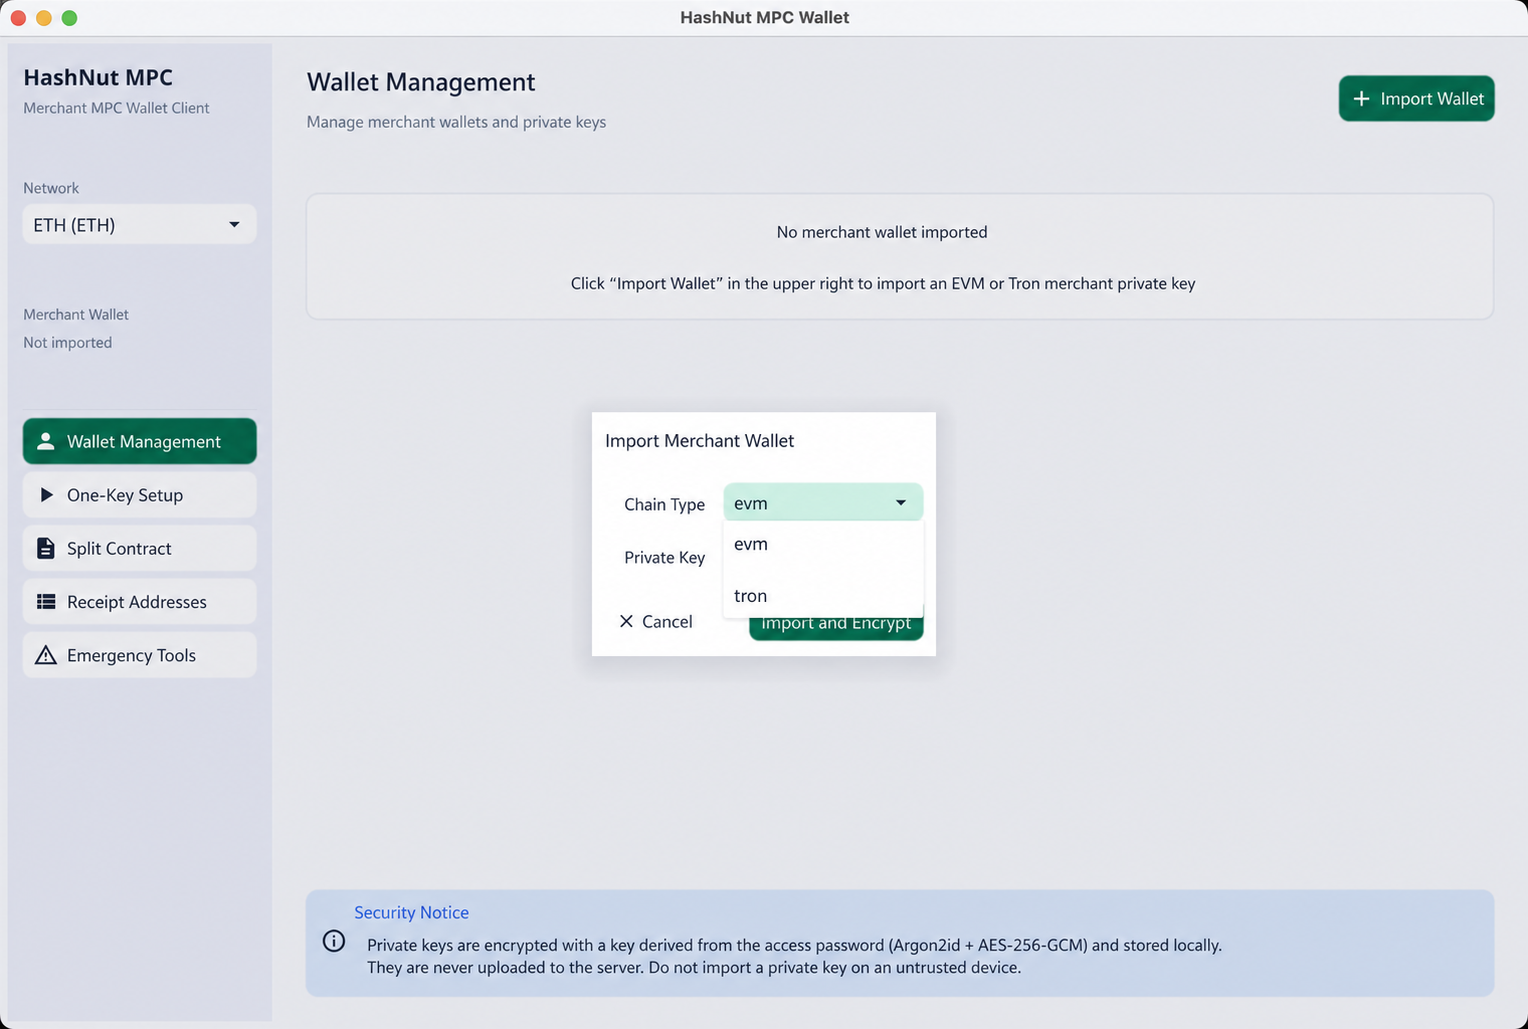
Paste the private key and import
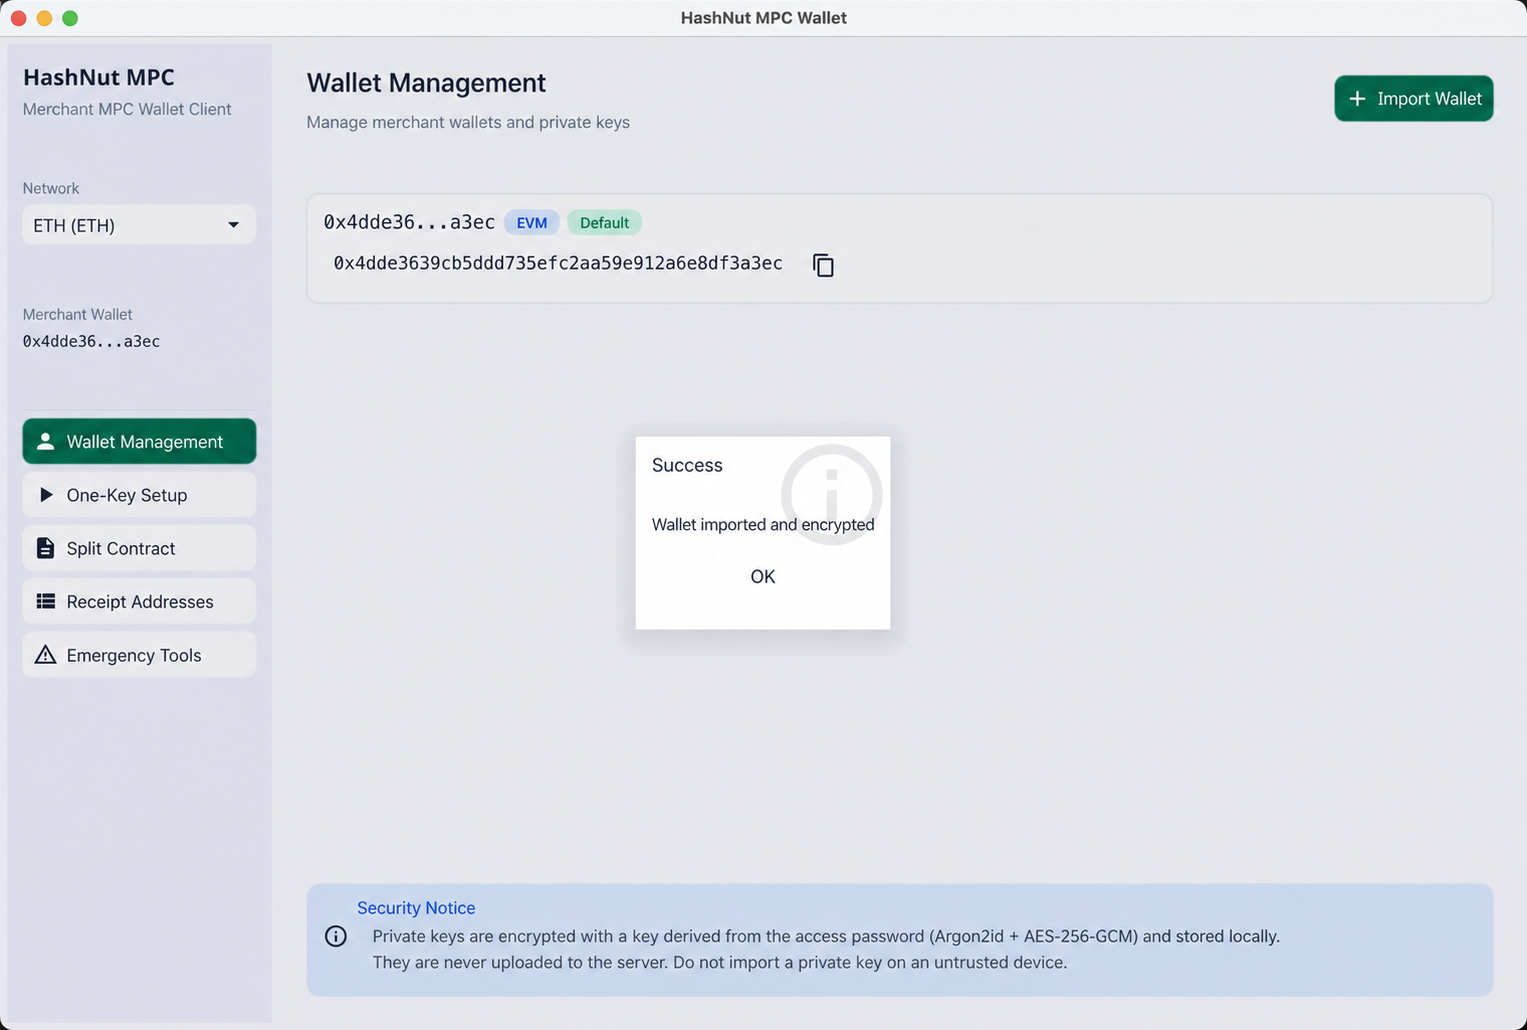
Imported
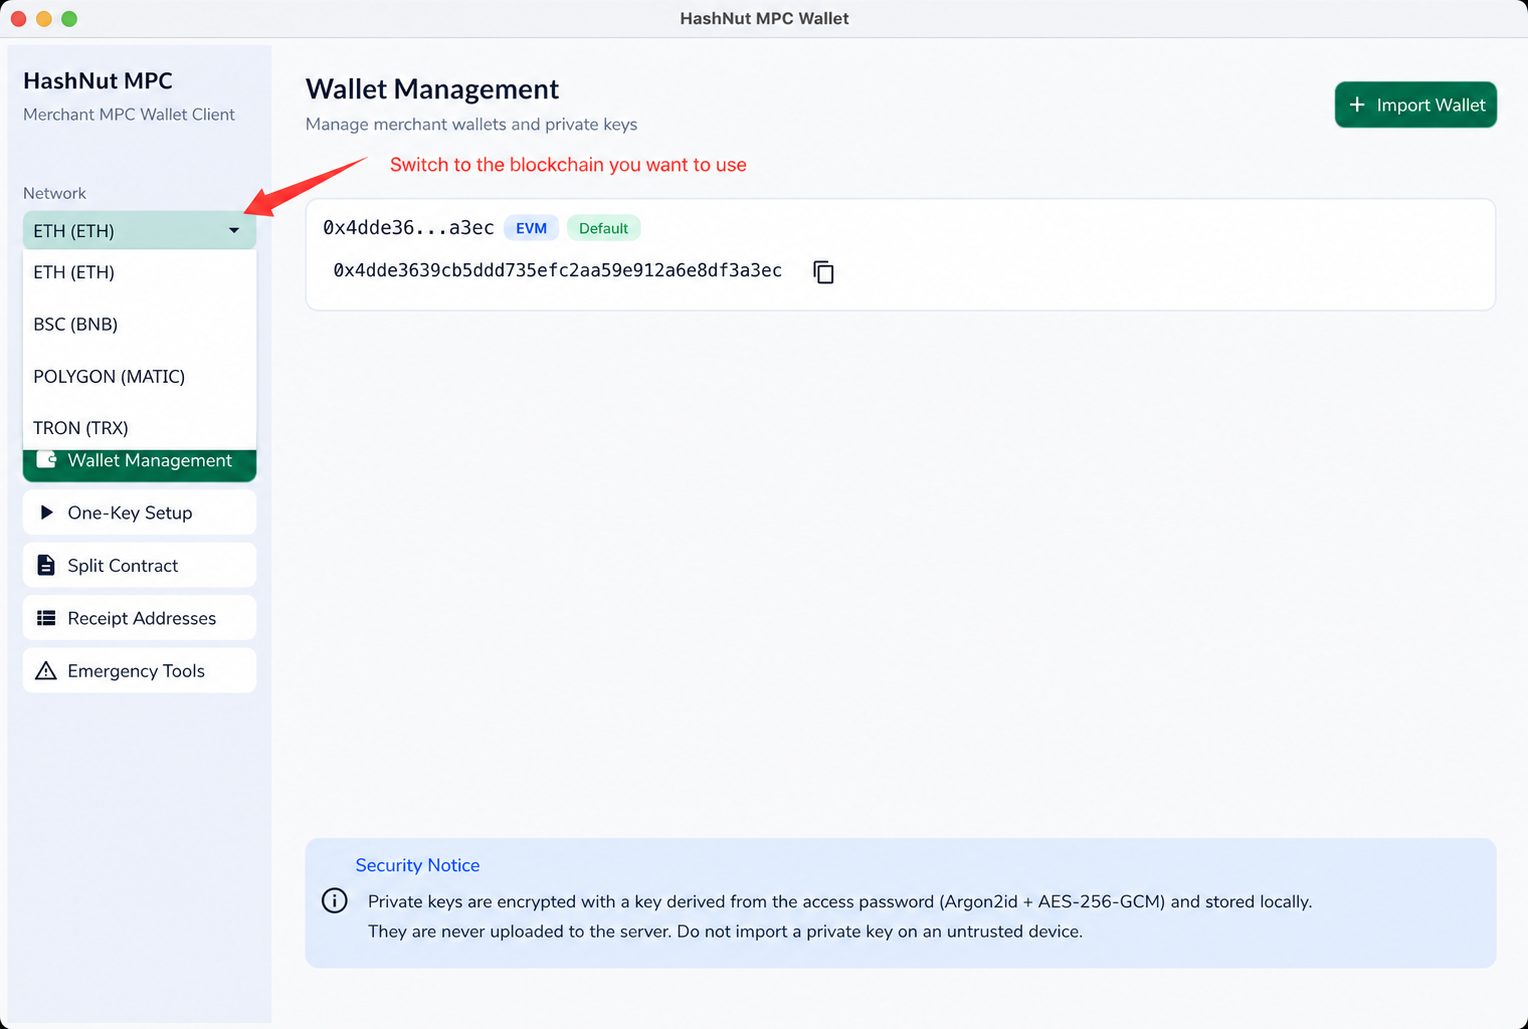
Switch to the chain you want to use
1.3 Filling in the one-key setup parameters
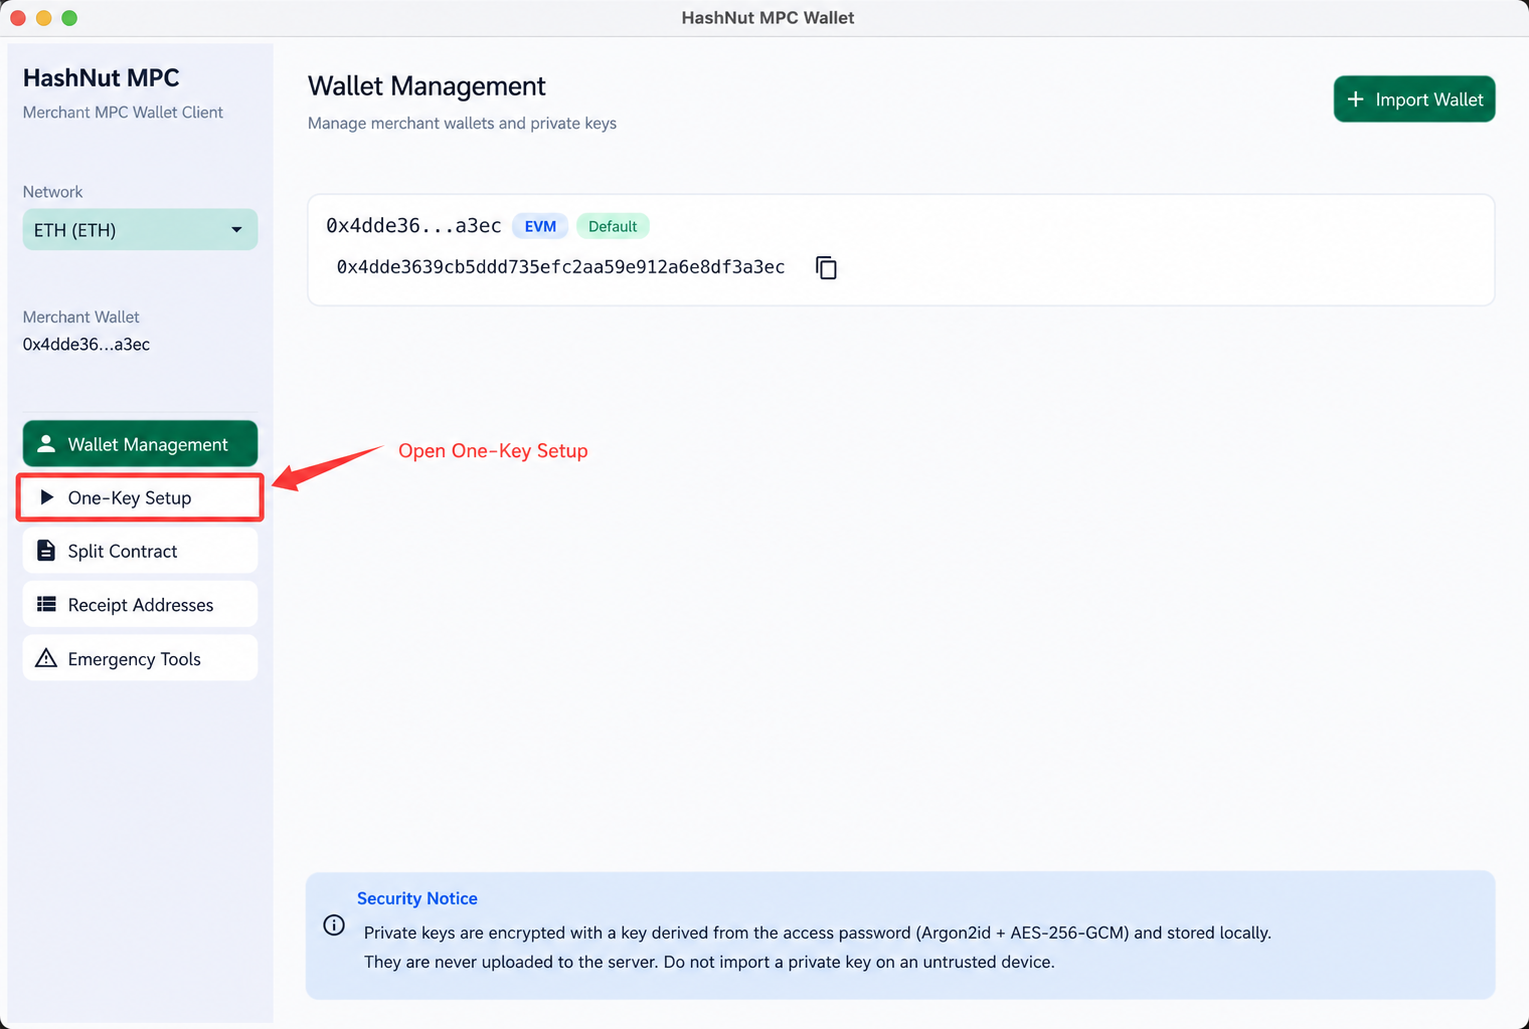
Open the One-Key Setup page
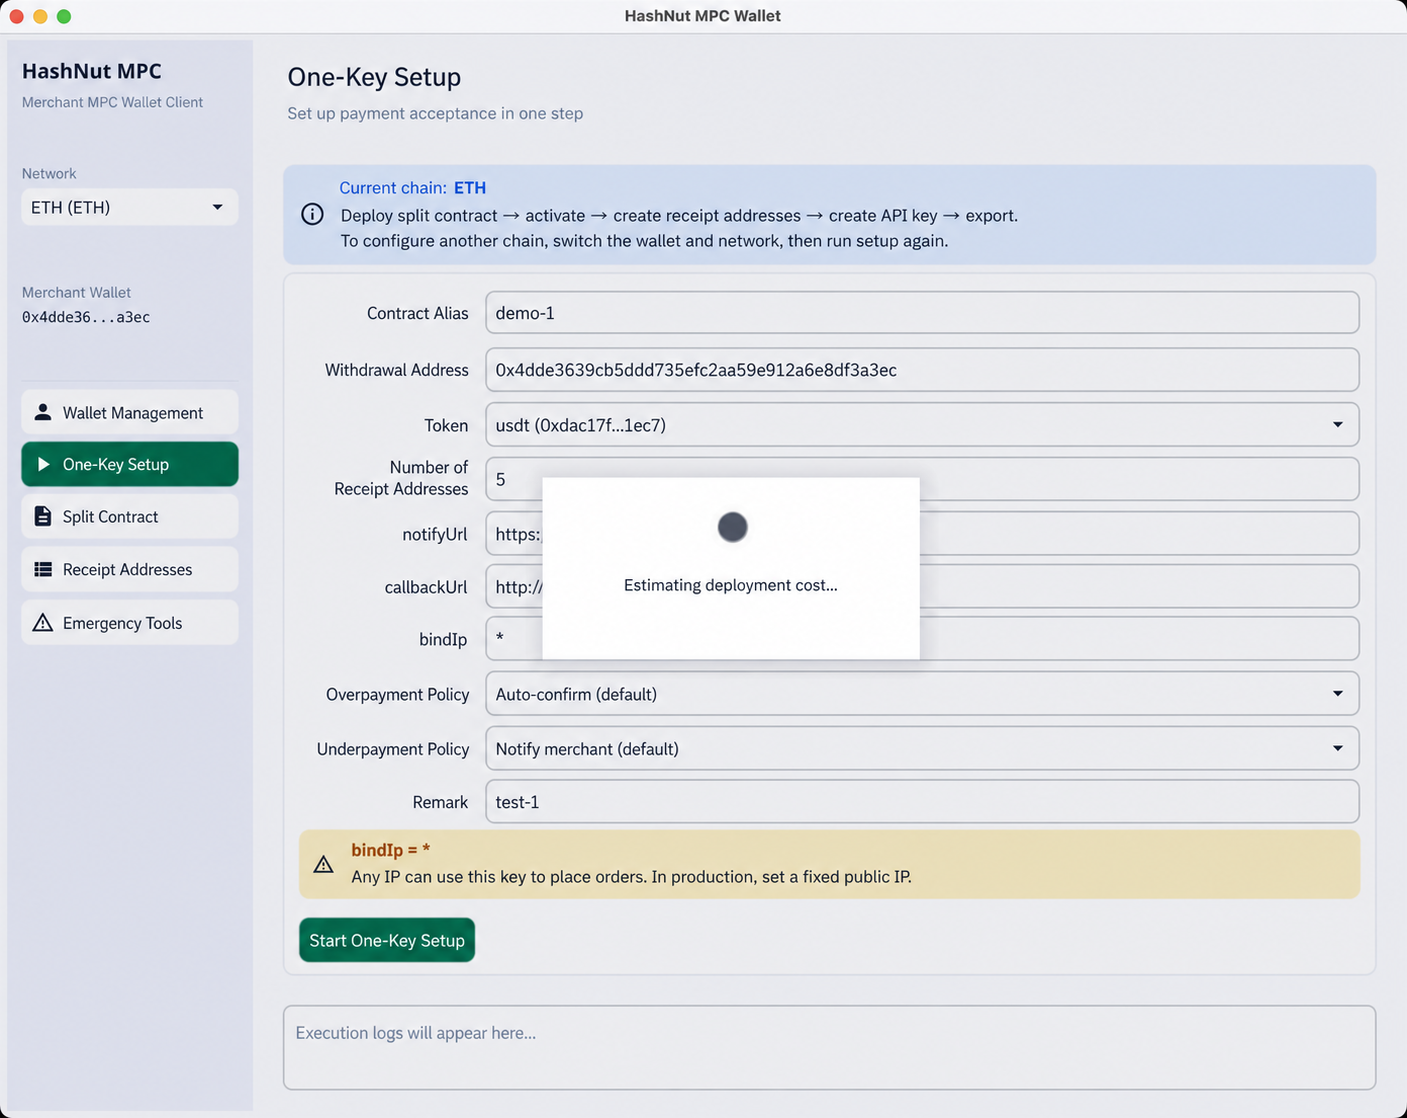
Fill in the parameters
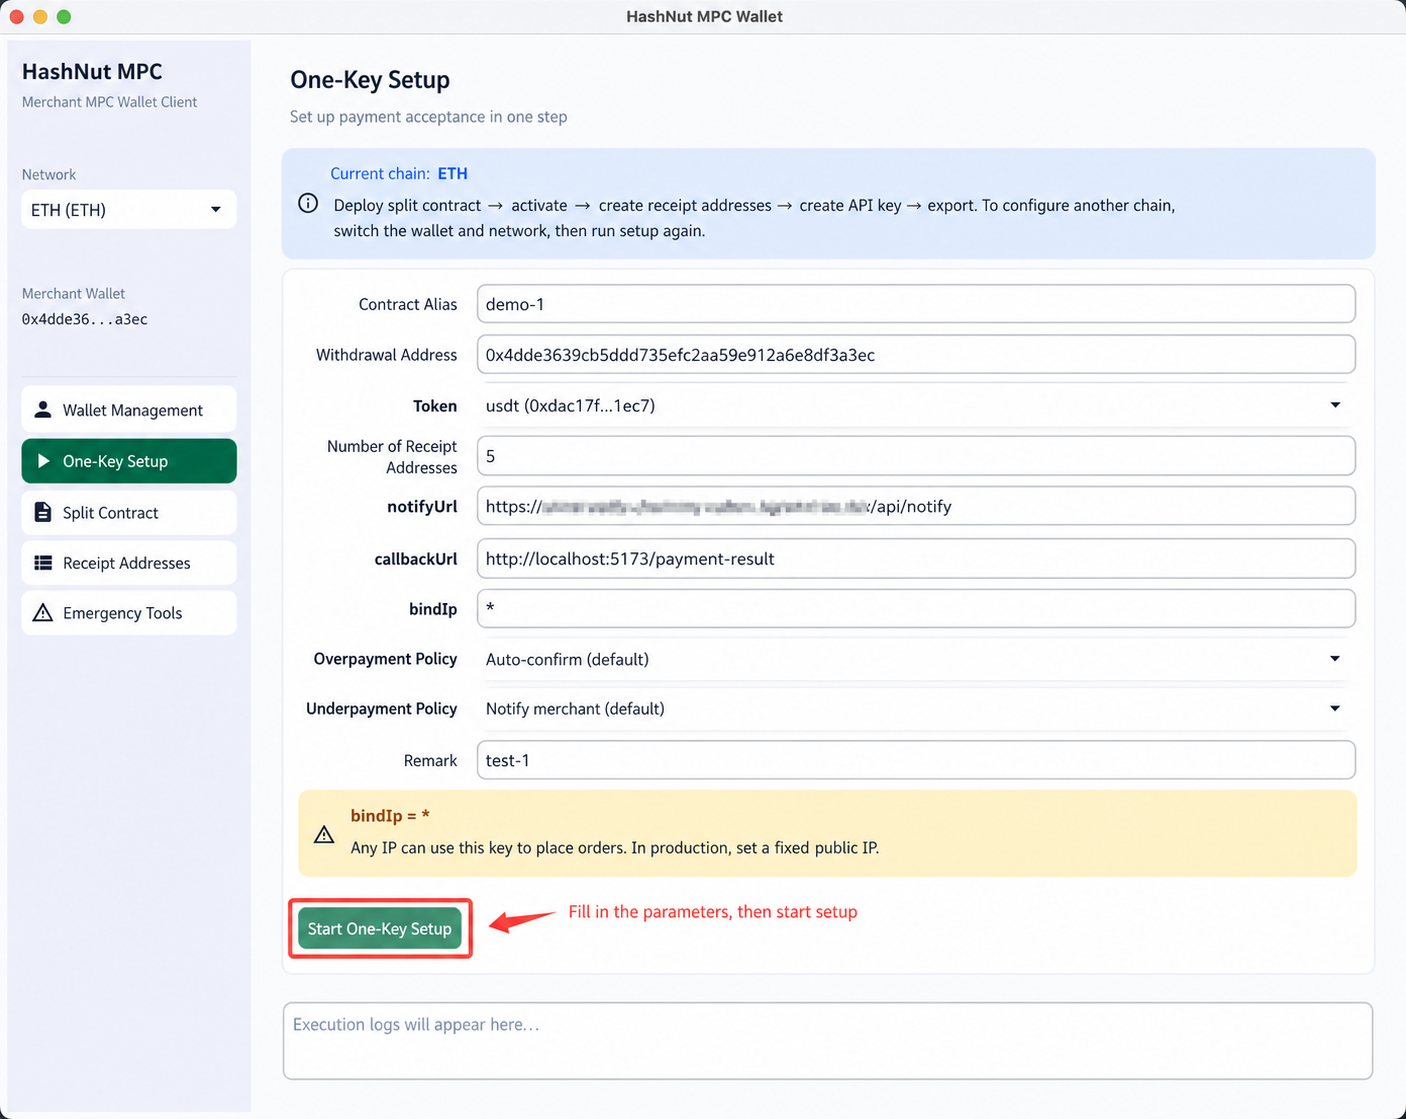
- What each parameter does:
Parameter Purpose Contract alias A name for the split contract. After deployment you will see the contract under this name in the dashboard and in the MPC Client. Withdrawal address Where funds go when you withdraw, after the money customers paid has been aggregated. Token The token the receipt addresses authorise the split contract to move, usdtby default. Each receipt address grants the split contract permission to transfer this token, which is how aggregation works.Number of receipt addresses How many receipt addresses to create. Start with 5; once you have verified order creation, aggregation and withdrawal, top it up to at least 50. notifyUrl The URL HashNut calls with order notifications — think of it as your webhook URL. callbackUrl Where the HashNut payment page redirects the user after the order is created. bindIp The public IP of the server that creates orders. Leave it as *for now and bind it in the dashboard once you have finished debugging.Overpayment policy What to do when a customer overpays. The default is auto-confirm: an overpaid order is treated as successful. Underpayment policy Whether HashNut notifies you when a customer underpays. The default is to notify. Remark A label for the API key, visible in the dashboard after setup completes.
TIP
During local development your machine is not reachable from the internet, and notifyUrl is the address HashNut calls you on, so it must be publicly reachable. If you have a public server, use it; otherwise a tunnel (ngrok, frp, Cloudflare Tunnel…) will do for now — see Appendix: Making notifyUrl publicly reachable. Get the public address ready before filling in the parameters below, so you do not have to come back and change them after discovering notifications never arrive.
callbackUrl is a browser redirect and does not need to be public. During local development just use the demo shop's frontend address, http://localhost:5173/payment-result.
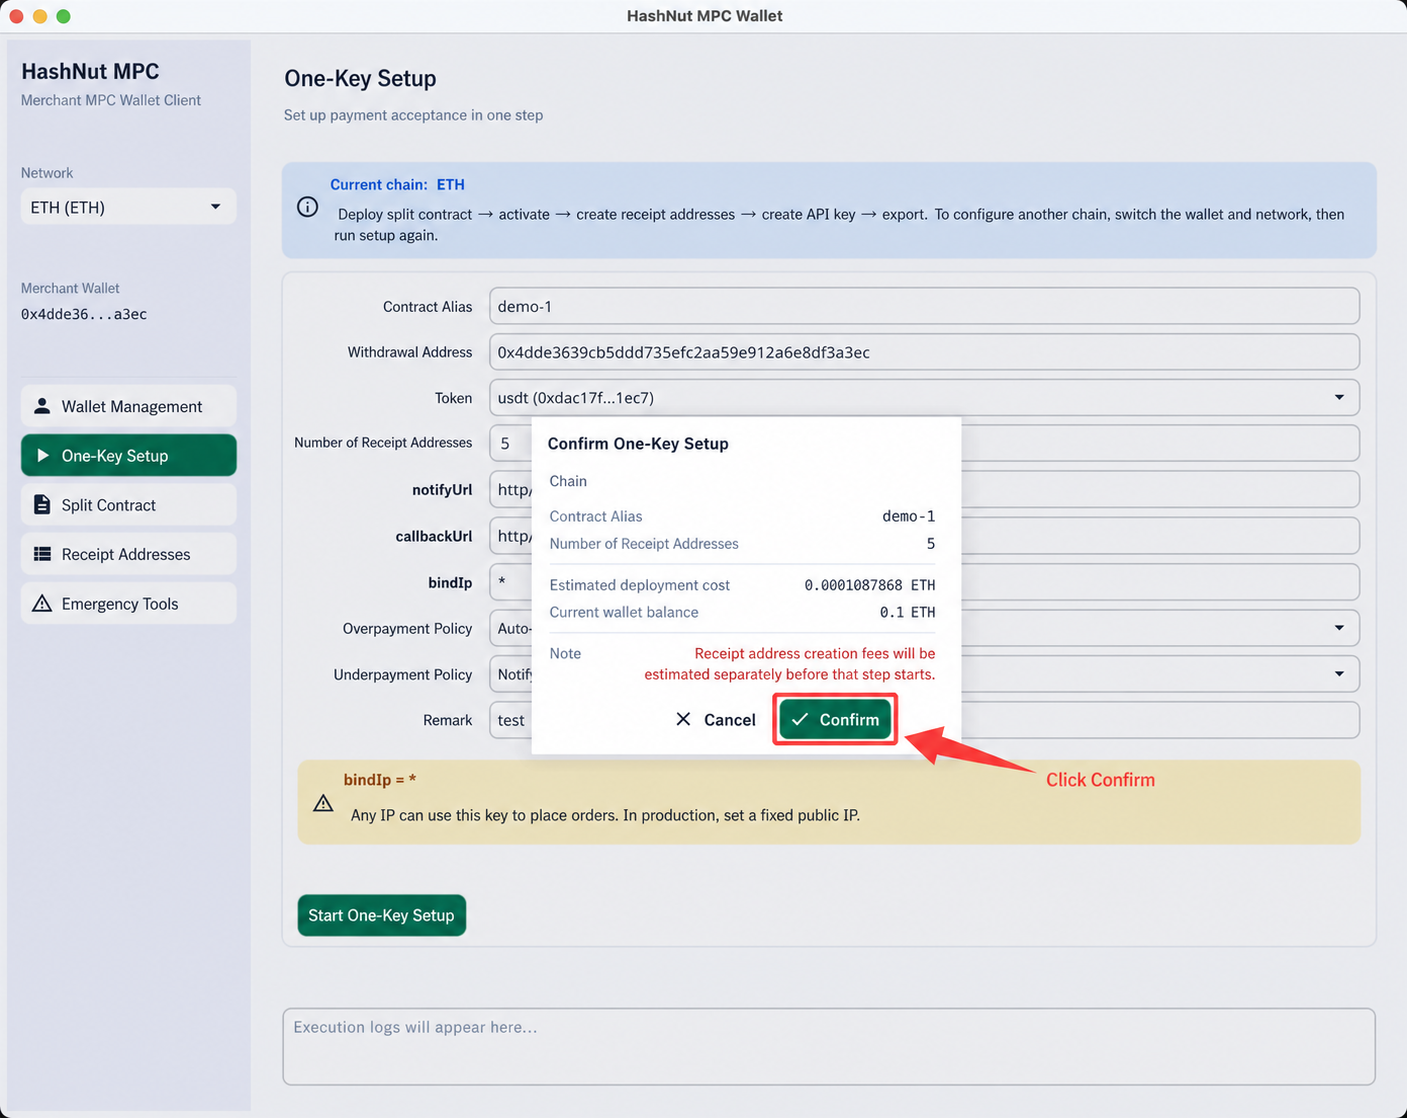
Estimate the fee
Confirm
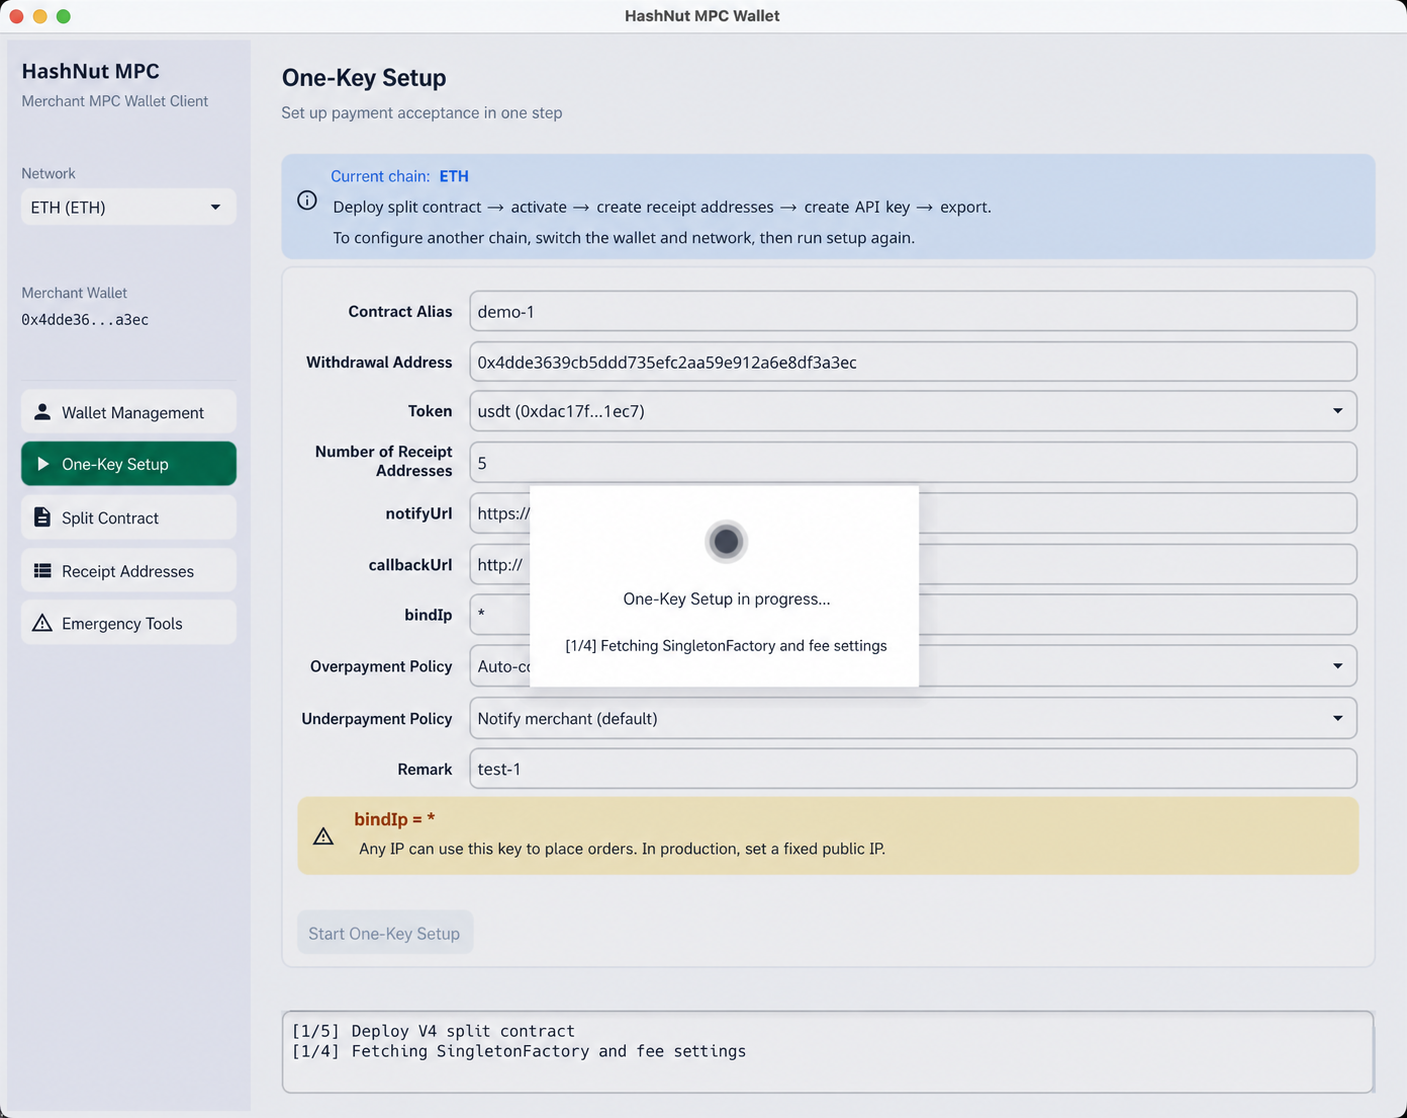
In progress
Finished
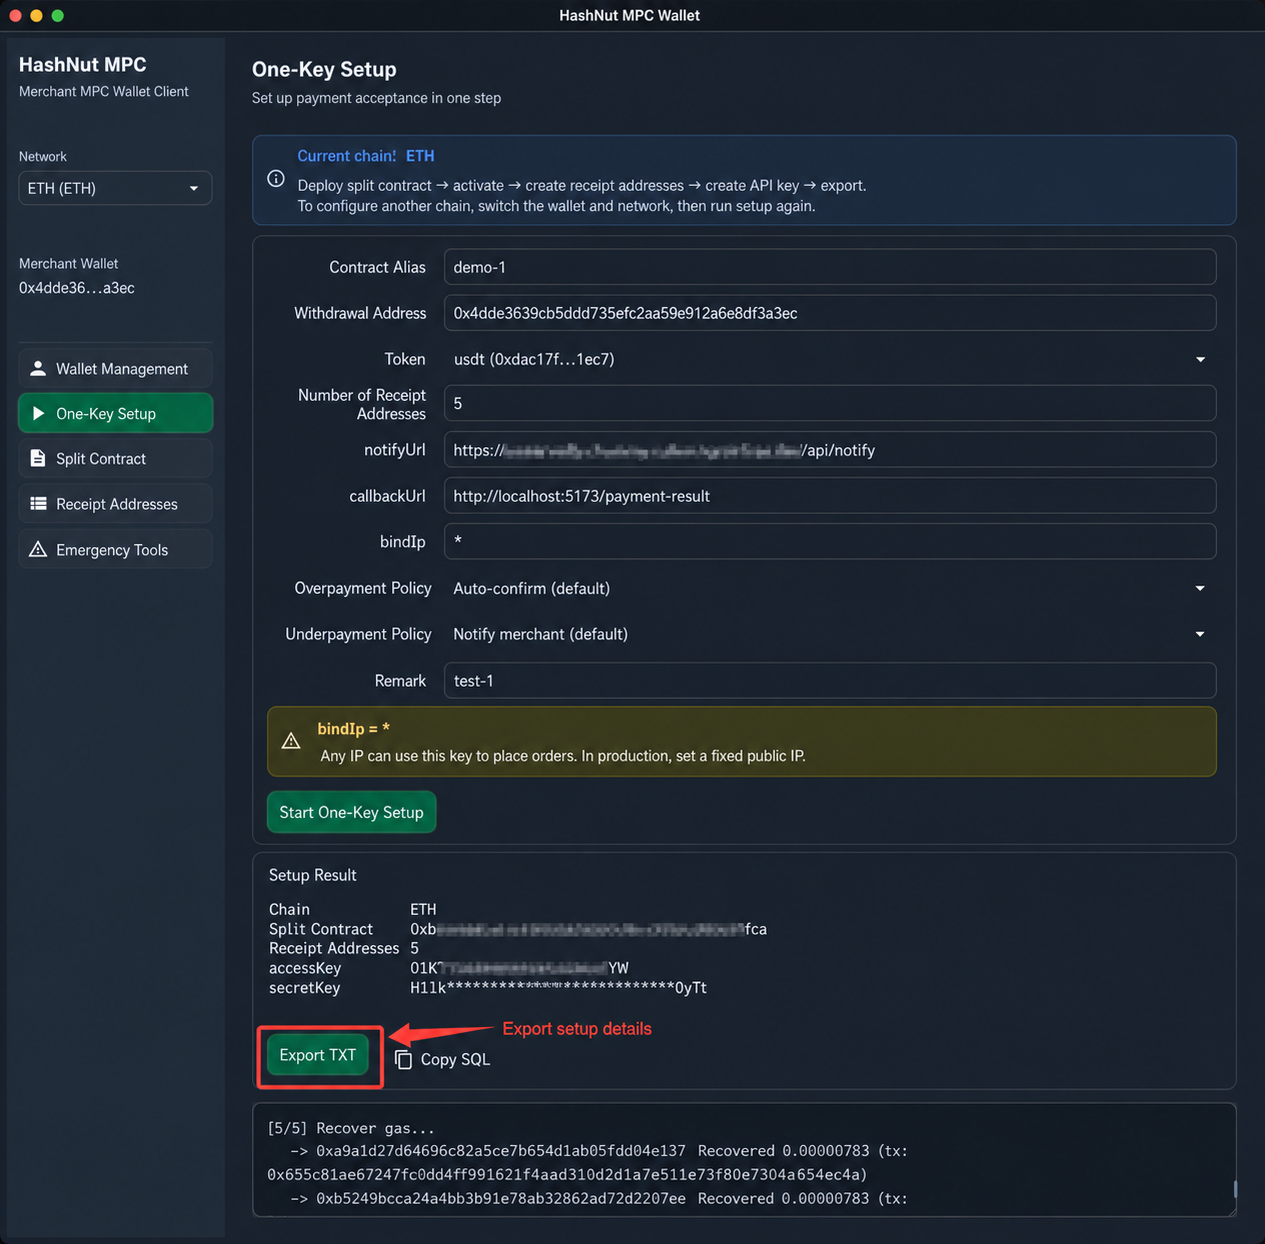
1.4 Save the account info
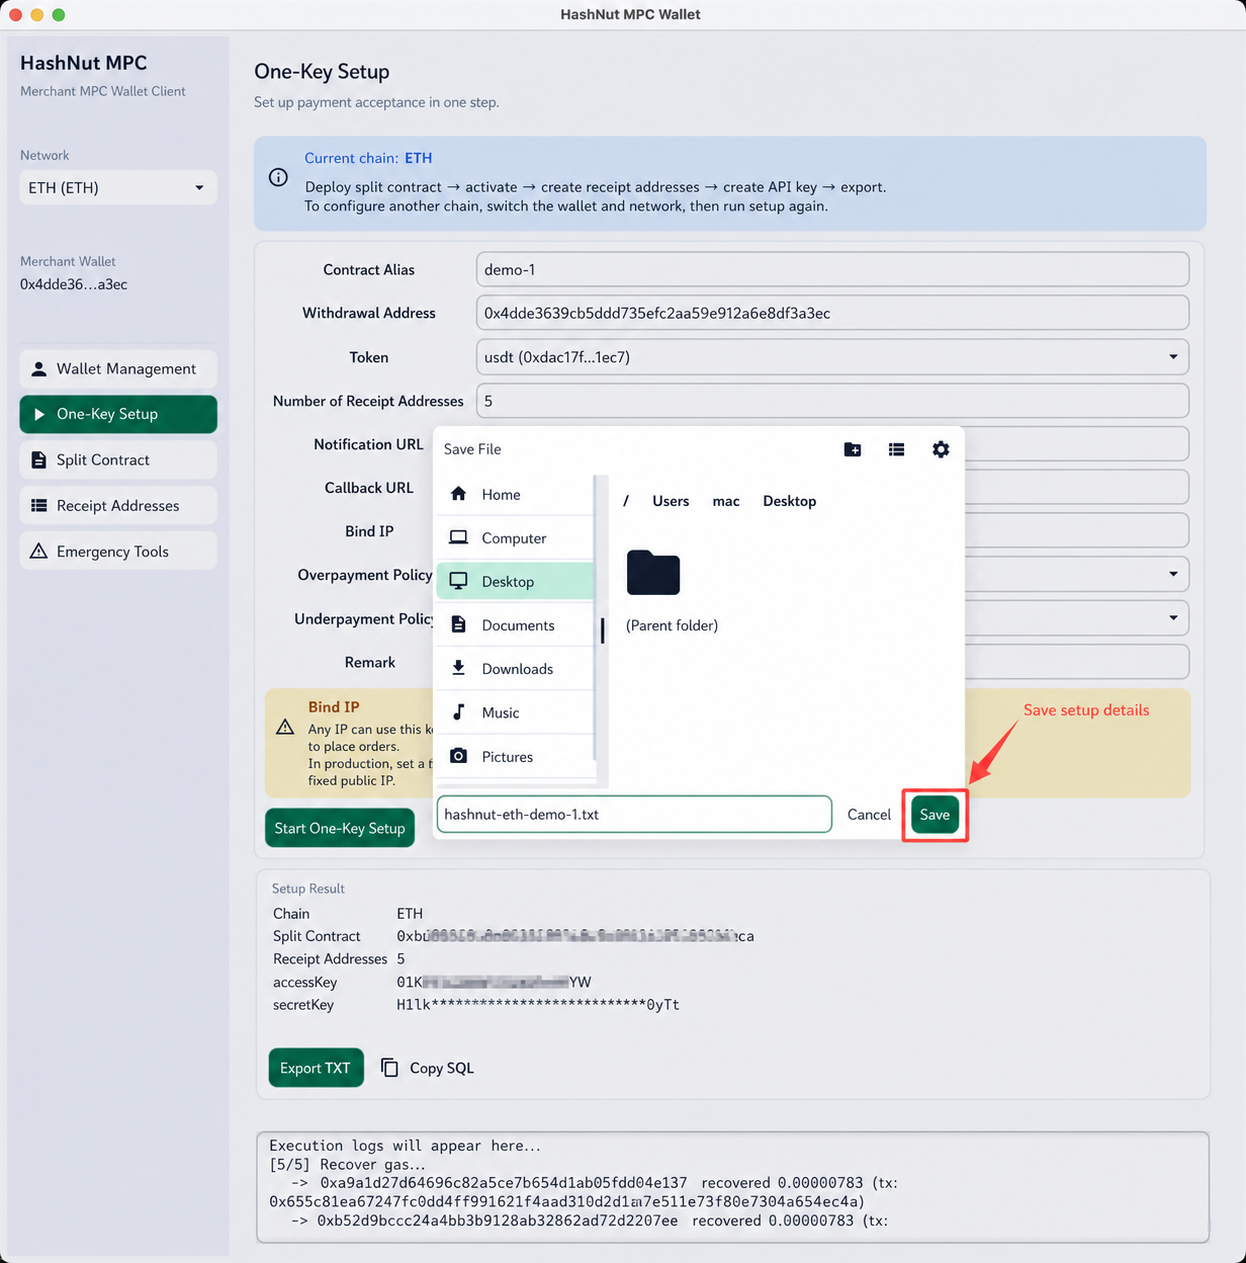
- The exported account info looks like this:text
HashNut One-Key Setup Result
Generated at: 2026-08-01 14:54:46
============================================================

Chain                 ETH
Split Contract        0xbd09...fca
Contract Alias        demo-1
Withdrawal Address    0x4d....ec
Token        usdt (0xdac17f958d2ee523a2206206994597c13d831ec7)
Receipt Addresses     5
Deployment Transaction  0xa19....73d

accessKey     01...YW
secretKey     H1...Tt
notifyUrl     https://.../api/notify
callbackUrl   http://.../payment-result
bindIp        *
Overpayment Policy    Auto-confirm (default) (AUTO_CONFIRM)
Underpayment Policy   Notify merchant (default) (NOTIFY)

------------------------------------------------------------
Paste into demo-go / demo-java's migrate.sql
------------------------------------------------------------
-- HashNut One-Key Setup export: ETH / demo-1
INSERT INTO t_hashnut_api_key (block_chain, splitter, access_key_id, secret_key) VALUES
    ('ETH', '0xbd09...fca', '01...YW', 'H1...Tt')
ON CONFLICT (block_chain) DO UPDATE SET
    splitter = EXCLUDED.splitter,
    access_key_id = EXCLUDED.access_key_id,
    secret_key = EXCLUDED.secret_key;
WARNING
The secretKey is shown once only — it is not stored locally and the client cannot show it again. Export the TXT (or copy the SQL) before you leave this page. If you lose it, reset the API key in the dashboard.